
How to Dot Paint a Mandala: A Step-by-Step Guide for Beginners
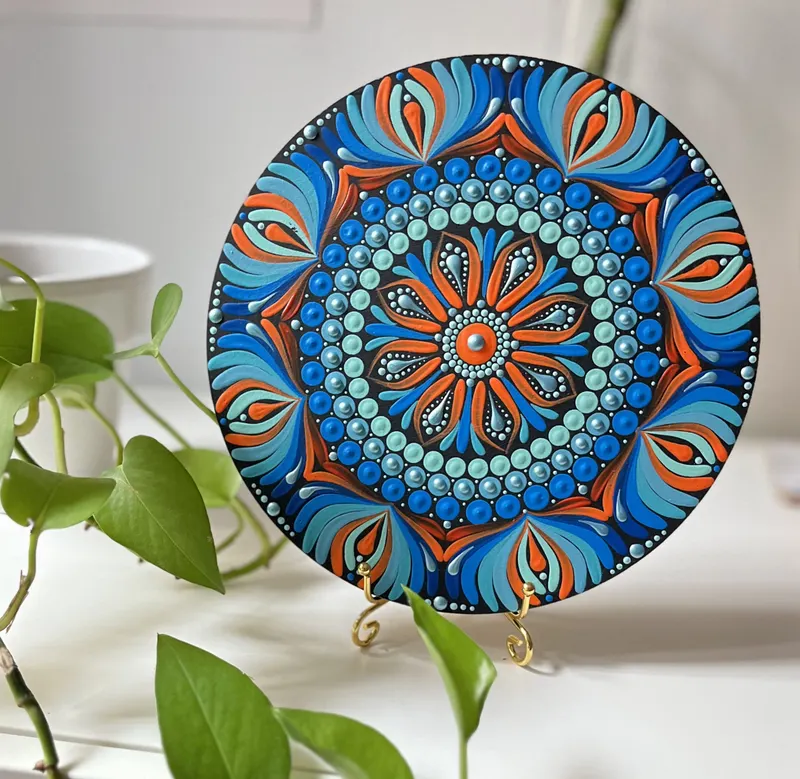
Dot mandalas look impossibly intricate, but every one of them is built from a single, simple movement: dip, touch, lift. If you can make one round dot, you can make a mandala. The rest is patience, rhythm and a little planning.
This guide takes you through your very first piece, the same way every Blissfull Dots mandala starts: from the centre, one ring at a time.
What You Need
You don’t need a big art budget to start. For a first mandala you need:
- A surface. A wooden round (15–20 cm) or a smooth stone is ideal. Heavy card or a black paper sheet works for practice.
- Acrylic paint. Ordinary craft acrylics are fine. Choose four or five colours that sit well together plus white.
- Dotting tools. Ball-ended stylus tools in several sizes. The flat ends of pencils, paintbrush handles and even cotton buds make good larger dots.
- A palette. A plastic lid or an old tile.
- A pencil, ruler and compass (or a circular lid) for the guide lines.
- Kitchen paper and water for cleaning the tools.
If you paint on wood, a coat of black or dark blue base paint makes the colours glow, which is why so many dot mandalas, including many of ours, are painted on dark backgrounds.
Step 1: Draw a Simple Grid
Symmetry is what makes a mandala calm to look at, and symmetry comes from a grid.
- Mark the centre of your surface.
- Draw three or four concentric circles, spaced 1–2 cm apart.
- Divide the circle into equal sections with straight lines through the centre: 8 or 12 sections are easiest to begin with.
The pencil lines will be covered by paint. If you’d rather not draw by hand, our free dot mandala generator prints a ready-made pattern with a guide grid that you can trace or follow by eye.
Step 2: Load the Paint Correctly
This is the secret most tutorials skip. Round dots come from fresh paint for every dot.
- Pour a small puddle of paint, about the size of a coin.
- Dip the tool straight down so a small bead of paint sits on the tip.
- Touch the surface vertically and lift straight up. Don’t press or drag.
If your paint forms peaks, it’s too thick: add a drop of water. If it spreads into flat puddles, it’s too thin. The right consistency is like melted ice cream.
Step 3: Start at the Centre
Paint one large dot in the middle with your biggest tool. This is the bindu, the still point that every mandala grows from. (Our guide to mandala symbolism explains why it matters.)
Around it, add a ring of small dots in a contrasting colour. Use your grid lines as markers: one dot on every line, then one dot halfway between each pair.
Step 4: Build Rings Outward
Work outward ring by ring. Each ring can use one of three easy patterns:
- A plain ring: dots of equal size, evenly spaced.
- Alternating dots: big–small–big–small, in two colours.
- Dot “drags”: a line of dots getting smaller as they move outward, made by dipping once and dotting several times without reloading.
Turn the surface as you work so you’re always painting at a comfortable angle, and never rest your hand on a ring that’s still wet.
Step 5: Add Dots on Dots
Once a ring is dry (10–20 minutes for acrylics), you can stack a smaller dot of a new colour on top of each dot. This “dot on dot” layering is what gives finished mandalas their jewel-like depth. It’s also the step where patience pays off: stacking on wet paint smudges both layers.
Step 6: Finish and Seal
When you’re happy with the outer ring, let the piece dry completely, ideally overnight. Then protect it with a clear varnish. Matte gives a soft, modern look and gloss makes colours shine. Every Blissfull Dots piece is sealed with a protective varnish or glaze for exactly this reason: it keeps the dots vivid for years.
Common First-Time Problems
- Dots have tails: you’re lifting at an angle. Lift straight up.
- Dots are different sizes: reload paint for every dot of a ring.
- Rings drift off-centre: check against your grid lines every few dots.
For a longer list of fixes, see our post on common dot mandala mistakes and how to fix them.
Keep Practising — or Let Us Paint One for You
Your first mandala won’t be perfect, and that’s part of its charm. Each one teaches your hand a little more about rhythm and spacing. Generate a new practice pattern any time with the dot mandala generator, and read our guide to dotting tools and paints when you’re ready to upgrade your kit.
And if you fall in love with the look but not the patience, every piece in the Blissfull Dots shop is hand-painted dot by dot in our studio.
Love what you're reading?
Explore handcrafted mandala art made with intention — or commission something uniquely yours.


